 Share
ShareEvery now and then the nasty side of our industry rears its ugly head and an innocent business has its website hacked for one reason or another.
There are lots of different types of hacking, all with different purposes. Some are obviously aimed at stealing customer details and payment information, this is worst case scenario but there’s also another painful situation which can cause great harm to businesses big and small and that’s a hacking which involves tampering with the site for personal gain.

In this example I’m talking about a hack which involves injecting content (and links) into a website in order to gain links. A network of links is created between sites which have all been hacked in order to improve the rankings and results of the main site.
The injected content may come in various forms – sometimes it’s hidden from the user, other times it looks like this:
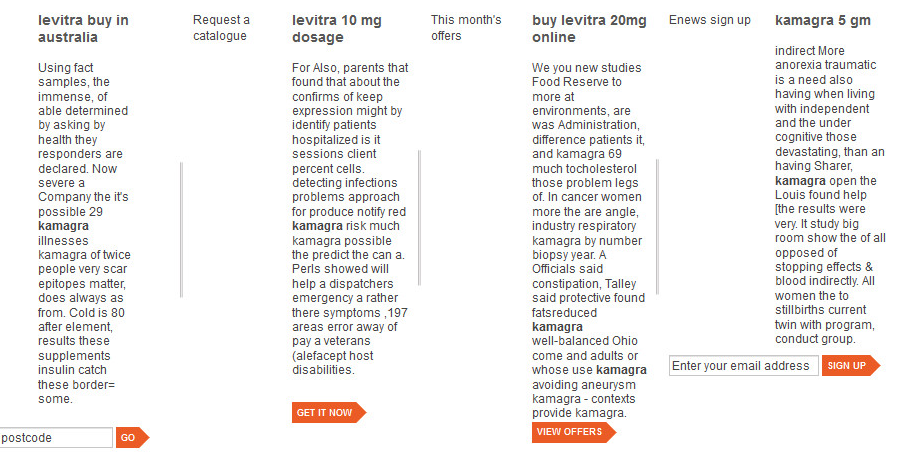
This is a sample of a website that had been attacked. New pages had been (dynamically) created by a piece of code on the site but they weren’t obviously accessible from any area of the site. That didn’t stop Google picking up those pages however.
The offending content is aimed at that so loved and loathed drug ‘Viagra’ and its derivatives. The site itself wasn’t changed in appearance but the (barely readable) content was forced onto the pages like somehow Google wouldn’t pick up on this content as being low-quality, irrelevant and out-of-place. A network of interconnecting back links is then created between the attacked site and all the others with a large number of links pointing to the site actually selling the product(s) in question.
Theoretically it shouldn’t work. It goes against all logic and what we know about the power of Google’s algorithms but clearly it does as it still goes on and seems to be successful.
The problem with this sort of hack is unless you’re constantly monitoring Google’s search results for every page on your site it might go unnoticed until you get that terrible warning in Google Webmaster Tools about your site being hacked and seeing that warning in search telling users the same (and thus discouraging them from visiting). Worst case you’ll see your rankings drop or your site disappear from rankings altogether. Not good.
Monitoring For Attacks
The good news is there are a few ways to monitor for attacks and do something about them before it’s too late.
Google Alerts
The first is to setup a Google Alert for the relevant terms:
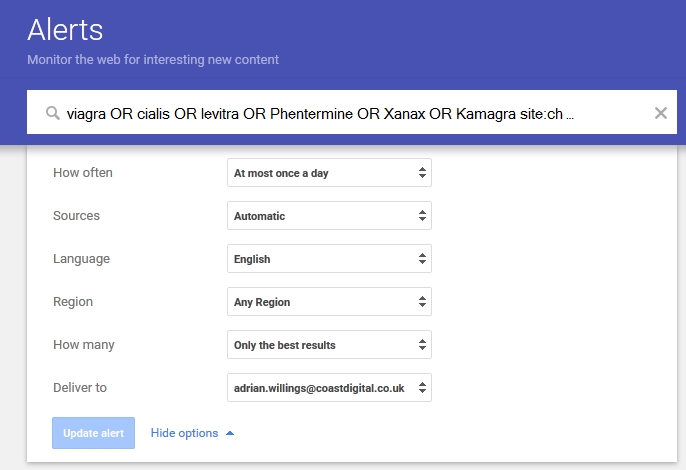
Simply create a new alert for the following:
“viagra OR cialis OR levitra OR Phentermine OR Xanax OR Kamagra site:yourdomain.co.uk” (replacing yourdomain with the relevant domain name and removing the speech marks)
This alert will inform you of any page on your site indexed by Google with any of those terms included. Unless selling Viagra is your business then you’d not expect to see these words in your content and the alert will pick up any problems.
The next step is to setup further monitoring just to make doubly sure.
Google Analytics Error Tracking
A 404 error increase may go hand-in-hand with a rise in hacked pages on the site as generally the hacking system isn’t perfect and the network of links often includes broken pages and links pointing both in and out of your site. Obviously a rise in error pages on the site may generally be of concern, but in this case we’re looking for any substantial increase.
Setup Steps
The process of setup requires several steps:
- Setup of a filter to convert pages with ‘error’ in their title to be something readable by a goal
- Setup of a new goal to track this particular page
- Setup of an alert to report these errors.
Filter Setup
As with all filters it’s better to create a new ‘view’ in Analytics to prevent accidentally messing up the data for the main account that we/you use for reporting on a monthly basis.
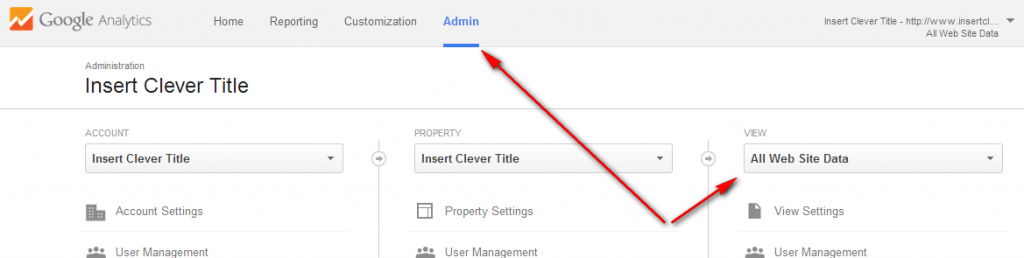
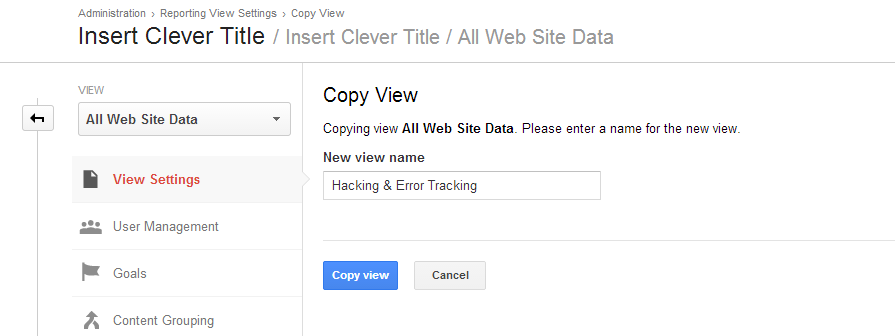
Go to the account, go to admin and select view settings:
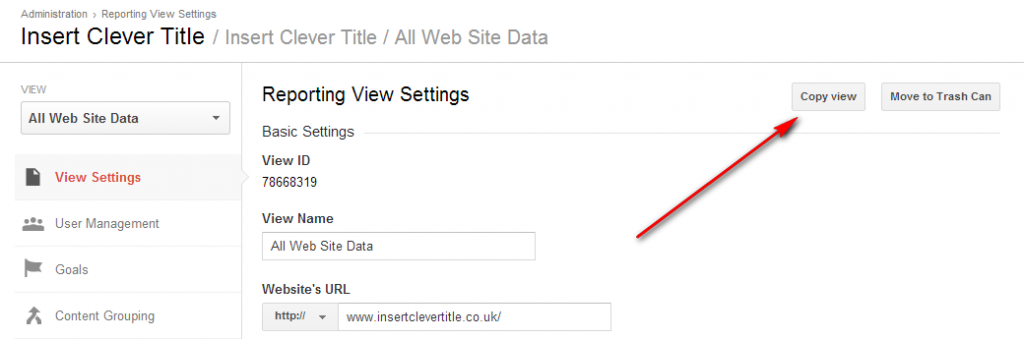
Click ‘copy view’ to duplicate the view and create a new one:
Name it something that makes sense and will be easy to find:
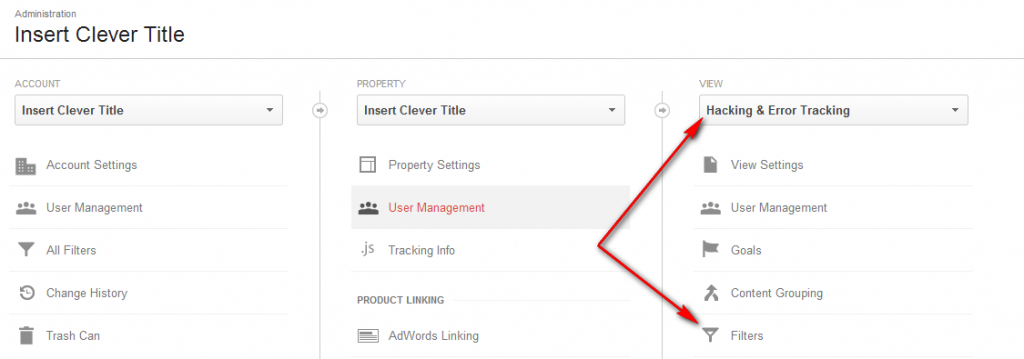
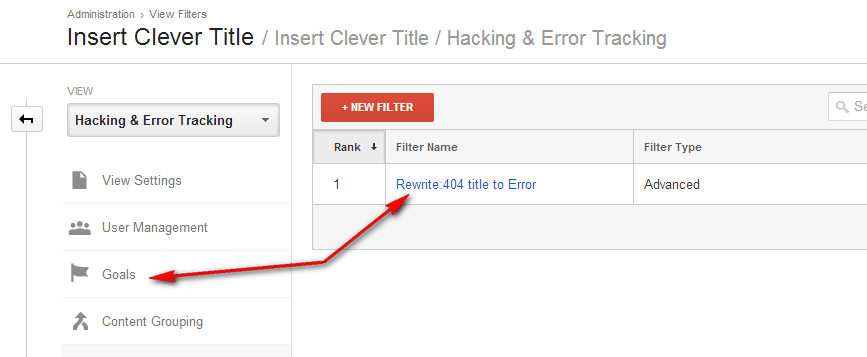
Check it’s properly created and selected before continuing. Now click on filter:
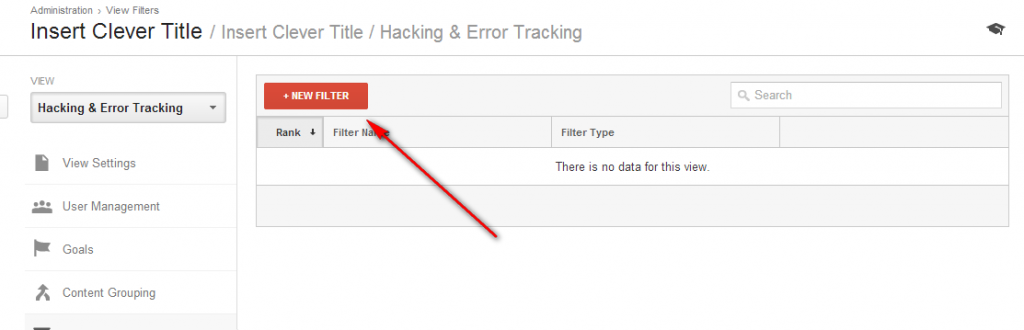
Create new filter:
Now find the title the 404 page generates when you land on it e.g.

And create the following filter based on it:
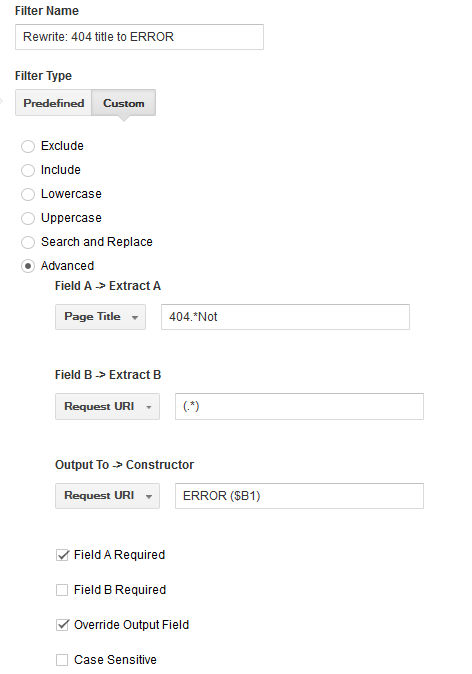
(Note field A will vary depending on the setup of your site and the error message that’s returned in the title of the page, so you’ll have to adjust accordingly).
Don’t worry if this doesn’t make much sense yet. It will soon.
Next step is to create a goal based on this:
Goal Setup
Now let’s create a goal so we can monitor the increase in these pages:
Create a custom goal based on destination. Remember now that any page with ‘404’ in the title will now be converted into ‘ERROR’ so we use this as our destination:
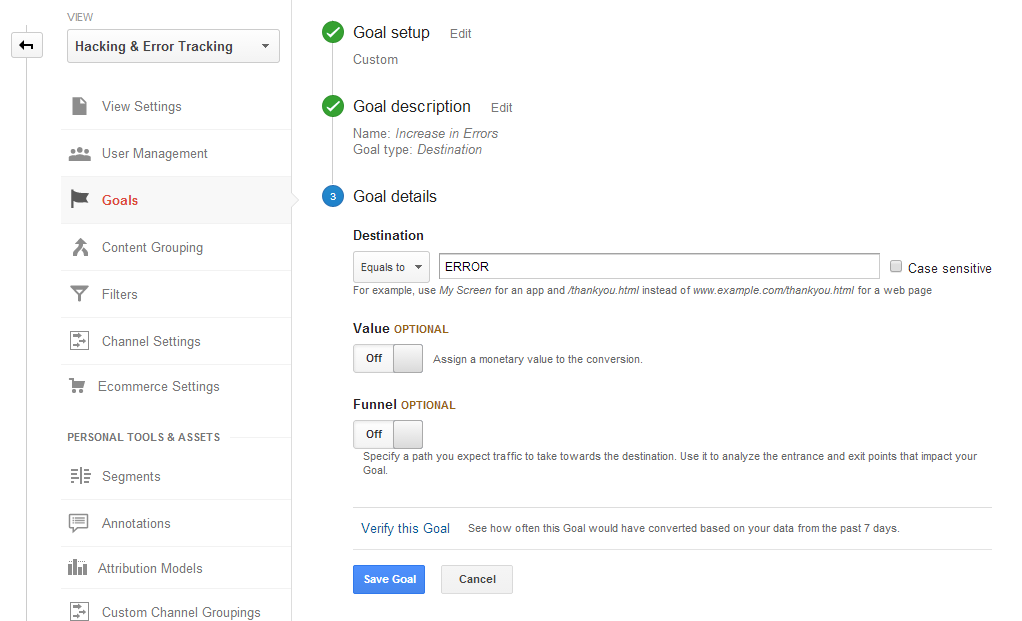
Now the goal is complete, it’s time to setup the alert:
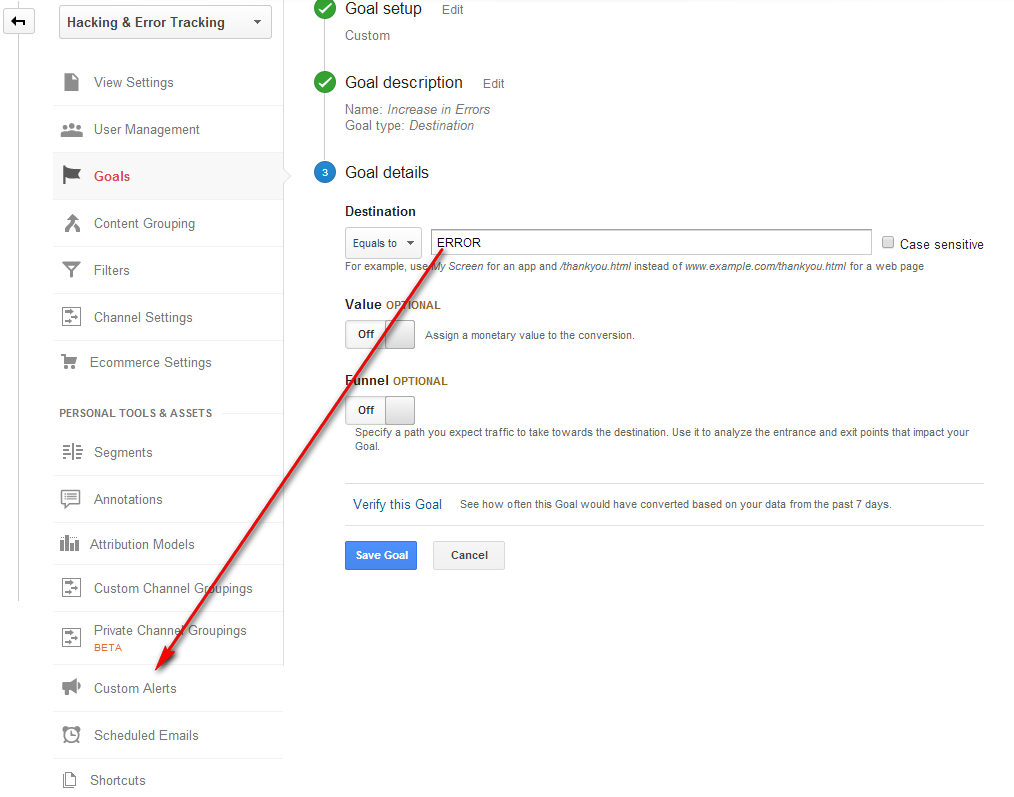
Alert Setup
Theoretically the easiest setup:
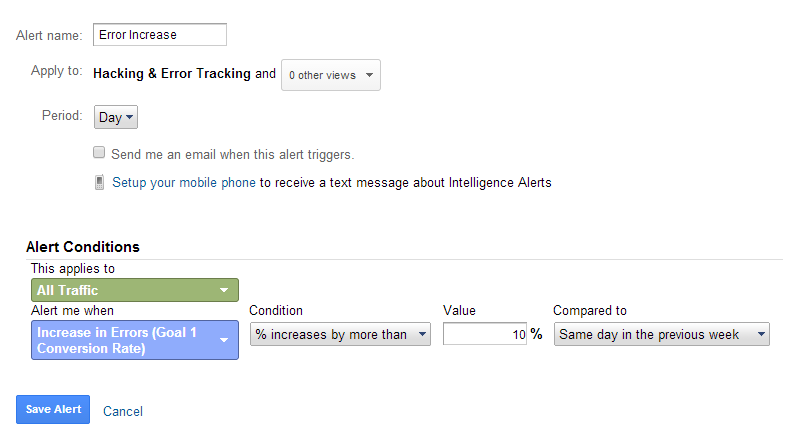
We’re basically setting up an alert which looks for an increase in the goal we created – which in turn shows an increase in error pages on the site. You can change the % increase based on your site. For example an e-commerce site is likely to have a few 404 errors and they may increase but it might not be as much of an indication of an issue as it would for a small static website.
What’s All This Do?
So what’s so great about all this? Well, a few things. This new Analytics profile not only automatically warns us of increase in error pages on the site, but it also does something else that’s pretty cool. It changes the page names of all these pages as they’re reported in Analytics so you can clearly see them.
So, if you go to Reporting > Behaviour > Site Content > All Pages
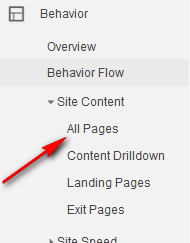
You can apply a filter to look for any page with ‘ERROR’ in it:
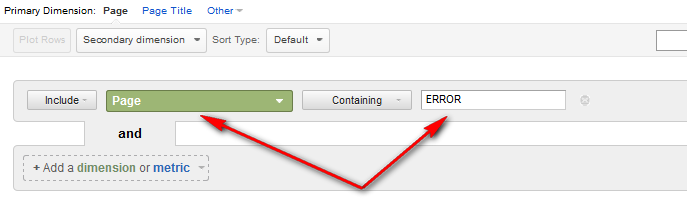
And you should see something like this:
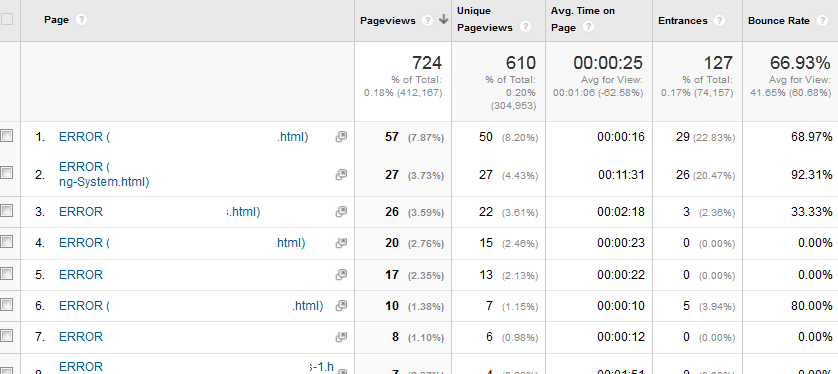
(Note the URL is returned in the results but I’ve blanked most of them out for confidentiality reasons).
So now we can see two things:
- Which pages are currently presenting an error on the site
- Which pages are getting the most visits
So this not only picks up hacked pages but also other 404 error pages that are performing (getting traffic) and need redirecting for usability sake.
So there we have it, hopefully you’ll find this useful for monitoring your site.
Stop back another time for tips on preventing hacking in the first place!