 Share
ShareUser interviews are one of the mainstays of the user research toolbox, they provide the qualitative insights needed to create personas and add colour to the data gained through website analysis or user surveys.
However, the logistics of running user interviews can be a bit of a mystery. While I don’t profess to be an expert, I have spent considerable time planning, arranging, conducting, and analysing user interviews, which puts me in a good place to share an approach.
Step 1: Planning
Before you dive into interviewing users, it’s vital to understand exactly what you are trying to find out. A research planning session is an important step where you can set out:
- The objectives of the research
- Any burning questions that the organisation has
- The methods of recruiting research participants
At this stage it is also possible to shape the research project:
- Will you be conducting a survey?
- Will you require a website poll?
- Will interviews take place remotely, or in person?
Following this session, it is always worth codifying the outcomes and sharing them with stakeholders, so the direction of travel is clear.
Step 2: Creating your discussion guide
Of course, you’re going to need some questions for your interviews. I’ve found it’s best to put these into a discussion guide, translated from the research objectives, which tends to follow this structure:
- Introduction: Your chance to introduce yourself and who you are working on behalf of. It gives the user a clear picture of what the interview will be about, why it is being held and what the outcomes of the research will be. It is also a good time to check that the user is happy for their conversation to be recorded and if they have any questions before you begin.
- Building rapport: Many users will be nervous at the start of the interview, which can cause them to clam up if you start asking probing questions right away. I’ve found that it is best to open with a general question, something light such as what they do for a living, what does their day look like etc. This can help to make them more comfortable before the interview begins in earnest, so they open up more.
- Exploratory questions: The meat of the interview; here it is best to have a set of topics served by broad introductory questions. Once the user is discussing a particular topic, you can ask follow-up questions to build the detail around research areas or the qualitative insight you are hoping to gain in response to the research objectives.
- Close: Once you have everything you need from the user it is, of course, important to thank them for their time. If you have offered an incentive, now is also the time to give them details of how this will be fulfilled and in what timeframe. Finally, you should ask the user if they have any questions and let them know that they can contact you in future if any further information comes up.
Step 3: Recruiting and Arranging interviews
There are several methods of recruiting users to take part in research (too many to cover here), but typically, some form of incentive is helpful, as is utilising existing customer data as that audience is likely to be warmer. An effective way to recruit for interviews is to use a question at the end of your survey, so you can select from existing data to cherry pick interviewees that will be most valuable to the research project.
Arranging interviews can be a bit of a logistical nightmare with laborious outreach and a fair amount of Outlook tennis. In recent years, I’ve been using a tool called You Can Book Me, which has made organising interviews much easier. Essentially, it allows you to create a calendar of bookable slots that is accessible via an individual URL, you send the URL out to participants, they choose a time that suits them and (with the help of some integrations) it pops calendar invites into diaries and sets up Zoom calls.
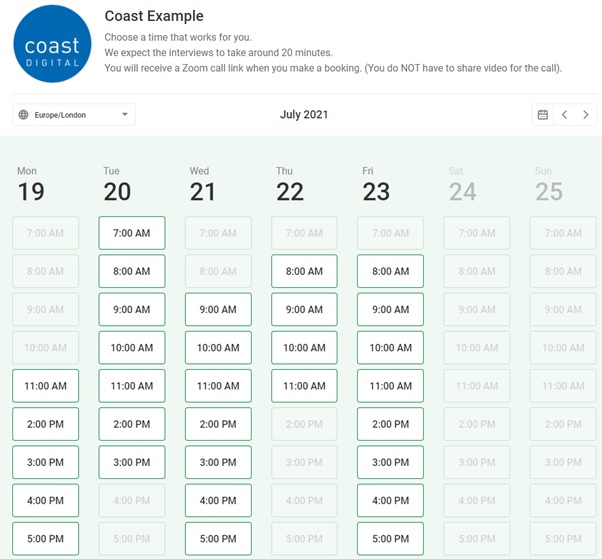
(Above) An example You Can Book Me landing page. The user selects a time, adds their details and then scheduling is automated.
You Can Book Me really does take the sting out of the logistics of arranging interviews and through automated scheduling, reminders, and rearranging functionality, makes life much easier!
Step 4: Conducting interviews
With an extensive discussion guide you should be well prepared for your interviews in terms of what you need to say and the questions you need to ask. The difficult part of any interview is to maintain active listening throughout so that you can take accurate notes. If you have the luxury of a dedicated notetaker, great, but in situations where you are both the interviewer and notetaker, it is important to take light notes so that you can listen to responses and really understand what the user is trying to say.
There are a wide range of notetaking styles to follow when conducting interviews, but the approach that works for me is using sticky notes to quickly jot down the pertinent points and any direct quotes (if you miss anything, note down the time so you can go back and check your recording afterwards). I’ve started using a virtual whiteboard called Miro for notetaking as it has a quick add feature for sticky notes, which makes it much easier to maintain active listening while taking notes. It also handily lays out the sticky notes on a virtual whiteboard for analysis later down the line.
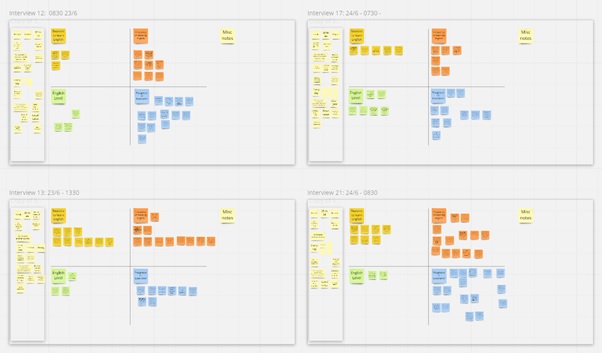
(Above) Interview notes per interview, colour coded by theme.
Step 5: Analysis
You can make analysis easier by ensuring your whiteboard is set up in a way that allows you to quickly arrange and group notes during the analysis process. In Miro, I tend to create an area for each interview that I can quickly add sticky notes. Immediately after the interview, I colour code the notes based on the topics in my discussion guide, clarifying any of my notes while the context is still fresh in my mind.
With colour coded notes for every interview, it is much easier (and faster) to arrange them into broad subject groups and group each note by theme/colour. Once notes have been grouped by their broader themes, you can then dive into each theme and conduct further categorisation in detail, splitting the notes into the sub-groups that will eventually become your main findings.
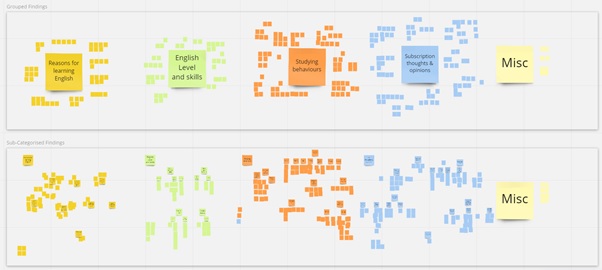
(Above) Grouped notes by theme (first row) and notes grouped by sub-category into research findings.
With notes organised in this way it is just a case of looking at each of your sub-groups, summarising them into a research finding and including that within your research document. As a sidenote, a virtual whiteboard with search functionality also makes it easier to find those killer anecdotal quotes that support statistical findings.
Conclusion
This is obviously just one approach to conducting user interviews, but it’s an approach I’ve been using for a few years, and I find it to be the easiest and fastest way to plan, arrange and analyse interviews. Ultimately, I’ve found it to be the most effective way to arrive quickly at meaningful conclusions from this type of research, and my advice to anyone conducting user interviews is to give it a try!
If you’re interested in conducting user research and are looking for support. Get in touch.